Polishing Rocks Perfectly with a Dremel Tool
Overview of the Topic
Rock polishing is a satisfying and meditative hobby that attracts many enthusiasts. Using a Dremel tool adds a new dimension to this art, making the process not only effective but also enjoyable. Here, we delve into what rock polishing entails and how a Dremel can become an essential part of that technique.
Definition of key terms
- Dremel Tool: A versatile rotary tool, often used for crafting, that can be outfitted with various attachments for cutting, grinding, and polishing.
- Polishing: The process of smoothing and shining a rock’s surface to enhance its natural beauty.
- Grit: Refers to the size of abrasive particles within sanding and polishing materials, where a lower number indicates a coarser finish and a higher number signifies a finer polish.
Historical significance
The art of rock polishing has ancient roots, tracing back thousands of years when civilizations used rudimentary tools to give stones a finer finish. Early jewelry makers employed techniques similar to those used today, although the equipment was far less sophisticated. The advent of power tools, especially the Rotary Tool invented by Albert Dremel in the 1930s, revolutionized this field, allowing enthusiasts to achieve professional results from the comfort of their homes.
Types of Collectibles
When diving into the world of rock polishing, understanding the different types of rocks you can collect and polish is essential. Various gemstones and minerals can become stunning pieces with the right technique and tools.
Classification of different collectibles
- Igneous Rocks: Formed through the cooling of molten rock, examples include granite and basalt. These often have intricate patterns and shine beautifully when polished.
- Sedimentary Rocks: Created from the buildup of sediment, types like limestone and sandstone can yield stunning textures once polished.
- Metamorphic Rocks: Formed under pressure and heat, rocks such as marble and slate exhibit unique features and colors that come alive after polishing.
- Minerals: Crystals and gemstones like quartz, amethyst, and jasper can often be polished to showcase their natural sparkle and color.
Notable categories
- Geodes: Hollow rocks that can contain beautiful crystal formations on the interior.
- Fossils: Natural history meets artistry as fossilized materials are polished to reveal intricate details.
- Cabochons: Flat-backed polished stones, ready for setting in jewelry, showcasing both beauty and craftsmanship.
"The thrill of transforming a rough stone into a mirror-like beauty is what keeps enthusiasts coming back for more."
In this article, we are set to cover not just methods, but also tips that can sidestep common pitfalls encountered along the journey of rock polishing. Stay tuned as we explore the tools and materials required, detailed step-by-step methods, and the safety practices crucial for this rewarding endeavor.
Prologue to Rock Polishing
Rock polishing is more than just a hobby; it’s an exploration into the beauty hidden within the earth's crust. This process transforms rough, ordinary stones into stunning pieces of art, showcasing colors and patterns that were once concealed. For many, rock polishing serves as a therapeutic pastime, providing a creative outlet that deepens one’s connection to nature. Moreover, it fosters patience, as crafting a polished rock requires time and skill.
The significance of understanding rock polishing goes beyond the aesthetic appeal. It involves a series of techniques that, when mastered, can enhance the value of a collector's collection significantly. Additionally, as collectors dive deeper into this craft, they uncover important geological insights about the rocks they work with. This appreciation for the natural world can lead to a greater understanding of the environment and mineralogy, enriching the overall experience.
Polishing rocks with a Dremel tool opens a world of possibilities. The versatility and precision of this tool enable hobbyists to engage in detailed work, allowing for distinctive finishes that can capture and reflect light in mesmerizing ways. While rock polishing may seem straightforward at first glance, it carries with it nuances that can make a substantial difference in the final product, as well as in the polisher's technique.
In essence, mastering the art of rock polishing represents a journey filled with discovery and skill development. It appeals not only to enthusiast collectors but also to those with a keen eye for natural beauty. By investing time and effort into this craft, collectors can elevate their appreciation for geology while creating pieces that might just become the centerpiece of their collection.
The Appeal of Rock Polishing
Rock polishing attracts a diverse group of enthusiasts, from casual collectors to dedicated hobbyists. The allure lies in the transformational process – taking a seemingly mundane stone and bringing out its inherent beauty. The satisfaction derived from witnessing this metamorphosis offers tangible rewards, both visually and emotionally.
Many find joy in the tactile experience of working with stones, and the rhythmic nature of polishing can be quite meditative. The act of shaping and smoothing a rock is akin to sculpting; each motion removes a little bit of the past, revealing brightness and clarity beneath.
Furthermore, polished rocks can serve various purposes. From decorative elements to functional items, these treasures can be integrated into home decor or even used in jewelry making. There’s something quite special about wearing a piece of art—knowing it was crafted by hand from something once rough and unrefined.
Overview of the Dremel Tool
The Dremel tool is often touted as the Swiss Army knife of crafting. Its adaptability makes it suitable for a wide range of tasks beyond just rock polishing. Equipped with various attachments and accessories, this tool allows enthusiasts to customize their approach to suit their needs.
When it comes to rock polishing, the Dremel excels due to its high-speed motor and precision control. Whether it’s smoothing out rough edges or achieving a shiny finish, it gives users the ability to refine details that manual polishing might not easily accomplish.
Additionally, Dremel tools are user-friendly. Their ergonomic design allows for comfortable gripping, reducing fatigue during longer sessions. This is a valuable feature for those who might spend several hours perfecting their craft.
In summary, the Dremel tool not only enhances the rock polishing experience but also makes it accessible to a broader audience. With the right knowledge and techniques, any enthusiast can turn their rock polishing endeavors into finely crafted works of art.
Essential Tools and Materials
When embarking on the journey of rock polishing with a Dremel tool, it's crucial to consider the essential tools and materials you'll need. The right equipment not only makes the work easier but also enhances the quality of the final product. Rock polishing is no small feat, and having the correct tools can mean the difference between a mediocre finish and a stunning shine. Let’s dive into the details of what you’ll need to get started.
Choosing the Right Dremel Model
Not all Dremel tools are created equal. There are various models designed for different jobs. The right Dremel for rock polishing should have sufficient power and speed settings. A model that offers variable speeds typically provides better control over the polishing process, allowing you to glide through various rock types without overheating or damaging them. The Dremel 3000 is a popular choice due to its versatility and ease of use, but some enthusiasts swear by the more powerful Dremel 8220.
One important factor to consider is the size and weight of the tool. If you plan on polishing larger rocks, a corded model might be better to prevent battery fatigue. Conversely, a cordless model gives you mobility to work in different spots and not be tethered to an outlet.
Other Necessary Tools
Besides the Dremel tool itself, there are several other tools to keep close at hand during your polishing endeavors.
Safety Goggles
Safety goggles are a non-negotiable part of your rock polishing toolkit. During the polishing process, tiny particles and dust can become airborne, which can easily harm your eyes. Opt for goggles that have a snug fit and meet safety standards. A good pair not only protects against debris but also helps to shield against UV rays if you’re working outdoors. Some goggles also come with anti-fog features, which can be handy for longer sessions.
- Key Characteristic: Comfortable and snug fit.
- Benefits: Protects your eyes from small flying debris.
Respirator


Using a respirator is a wise choice when polishing rocks, particularly if you’re using materials that produce fine dust. Regular dust masks may not cut it; a respirator can filter out harmful particles more effectively. Choose a respirator with a good rating, such as N95 or higher, to ensure that you’re breathing clean air. This becomes especially crucial when you’re working with rocks that may contain silica particles, which can pose serious health risks over time.
- Key Characteristic: Efficient filtration of harmful particles.
- Benefits: Keeps your lungs safe while polishing.
Polishing Bits
Selecting the right polishing bits is vital to achieve a beautiful finish. Different types of bits are suited to various stages of the polishing process, from rough shaping to fine finishing. For instance, diamond-coated bits are well-regarded for their durability and efficacy in smoothing rough surfaces. Other materials like felt bits are often used for buffing to a brilliant shine.
- Key Characteristic: Variety in grit and application.
- Benefits: Allows for a range of finishes and details in polishing.
Selecting Polishing Compounds
Once you have your tools, you’ll need polishing compounds—a vital aspect of achieving the desired shine. Compounds vary in grit and type, and choosing the right one is essential.
Types of Compounds
There is a plethora of polishing compounds available in the market. Some common ones include cerium oxide for glass-like finishes and aluminum oxide for general polishing. Each compound has a specific application process, making it important to choose the one that suits your needs best. However, not all compounds work well with every rock type, so it’s beneficial to familiarize yourself with their specific uses.
- Key Characteristic: Different compounds for varied finishes.
- Benefits: Tailors to specific rock types for better results.
Application Techniques
How you apply the polishing compounds is as important as the compounds themselves. Using the Dremel tool at a consistent speed and applying even pressure will lead to uniform results. When using certain compounds, you may need to apply a small amount to the polishing bit and then work in sections, ensuring even coverage. Be cautious of over-polishing one area, which can lead to a flat spot rather than a natural curve.
- Key Characteristic: Requires careful technique and attention.
- Benefits: Enhances the overall quality of the polished rock.
Preparing Rocks for Polishing
Polishing rocks is a blend of art and science. To achieve that stunning luster and shine, you first need to prepare your rocks properly. This step is fundamental, as it impacts the final outcome significantly. Without adequate preparation, even the finest polishing techniques can't overcome the flaws that may exist on the rock surface. The effort invested in preparing the rocks saves time and compounds during the polishing stage, leading to cleaner and smoother results.
Cleaning Techniques
Removing Dirt and Grime
One of the first tasks in preparing your rocks involves removing dirt and grime. This step isn’t just about aesthetics; it's a crucial phase that greatly influences how well the polishing process works. When dirt accumulates, it isn’t just unsightly. It also serves as an impediment to effective polishing. If you don’t clean the rocks thoroughly, tiny particles can scratch the surface, leaving unwanted imperfections in their wake.
Think of cleaning as the warm-up – you don’t dive into sports without stretching. Using a soft brush to scrub the surfaces can yield impressive results. With a little soapy water, you'll find that removing dirt and grime is fairly straightforward. It ensures the rocks are primed for the next steps. Yet, skip this process at your peril; grime can act like sandpaper, hampering your polishing efforts and reducing their effectiveness.
Using Ultrasonic Cleaners
On another level, using ultrasonic cleaners has gained traction among dedicated hobbyists and professionals alike. This method employs high-frequency sound waves to agitate a cleaning solution, generating microscopic bubbles that effectively lift dirt and contaminants off the rocks.
The beauty of ultrasonic cleaning lies in its thoroughness. Unlike manual scrubbing, which can miss tiny crevices, ultrasonic cleaners reach every nook and cranny, ensuring a thorough clean. This is particularly beneficial for rocks with intricate patterns or textures. However, this technique requires a specific setup and might be overkill for simpler projects. That said, for more detailed pieces, it’s a heavenly choice that can exponentially enhance the polishing process by providing a spotless canvas to work from.
Assessing Rock Quality and Type
Equally vital in the preparation chapter is assessing rock quality and type. Not every rock is created equal. Some gems sparkle with potential, while others might present challenges. Knowing the hardness and composition of your stones can prevent heartaches down the line.
Different rocks respond to polishing strategies in varied ways. For instance, quartz tends to accept polish beautifully, showing impressive shine once treated. Conversely, softer materials like limestone can be trickier, often requiring gentler approaches or simply being left out of the polishing process altogether. Recognizing these characteristics means investing time in understanding your rocks, but what a reward when they emerge from the process looking splendid!
Thus, these preparatory steps not only lay a strong foundation for the polishing adventure ahead but also position you for success in achieving that impeccable glow.
"Proper preparation is the bedrock of a successful polishing experience. A clean and assessed rock is your best ally in achieving brilliance."
Taking the time to prepare your rocks is akin to priming a canvas before brush meets paint. This methodical approach brings out the best not only in your rocks but in your entire polishing journey.
Step-by-Step Polishing Process
Engaging in the step-by-step polishing process is likened to embarking on a journey where every phase holds its own significance. This section underscores the sequential approach that not only enhances the quality of the finished rock but also ensures you don’t overlook critical details. By following a structured method, you can manage time efficiently and minimize the chances of any mishaps, thereby coming away with polished rocks that would make any collector proud.
Initial Shaping Techniques
The initial shaping of the rocks is a vital starting point in the polishing process. Completely disregarding this step could lead to unsatisfactory outcomes later on. Begin by examining the rough edges and contours of the rock. Utilizing the right Dremel bit, aim to sculpt the rock into a more aesthetically pleasing form. You can use a diamond-tipped bit for effective shaping. Here’s a quick overview of important aspects:
- Select the Appropriate Bit: Choosing the right bit can make all the difference. A diamond bit works wonders on harder stones.
- Determine Your Design: Decide how much of the rough surface you want to keep. Less is often more when it comes to shapes; overdoing it might lead to losing the rock's character.
- Work Gradually: Don’t rush through the shaping phase. A steady hand and patience are your best friends here. Too much pressure could result in cracks or unwarranted damage.
To ensure the best results, spend ample time on shaping before moving to the next steps. It sets the foundation for the entire polishing journey.
Sanding and Compound Application
Once you've shaped the rocks, the next crucial step involves sanding. This part can feel a bit laborious, but it truly pays off. You will typically start with courser grits, like 80 or 150, to tackle any remaining scratches or rough spots.
- Sequential Grit Use: Start with a coarser grit for a rough initial smooth and gradually progress to finer grits like 220 and then 400. This gradual transition aids in creating a smooth surface.
- Compound Application: After sanding, it’s time to introduce polishing compounds. These vary in consistency and purpose. For example, tin oxide is great for achieving that glossy finish.
- Even Distribution: When applying the compound, make sure it's evenly spread across the rock surface to avoid patchy results. A soft cloth or felt pad can aid in this application.
Final Polishing Techniques
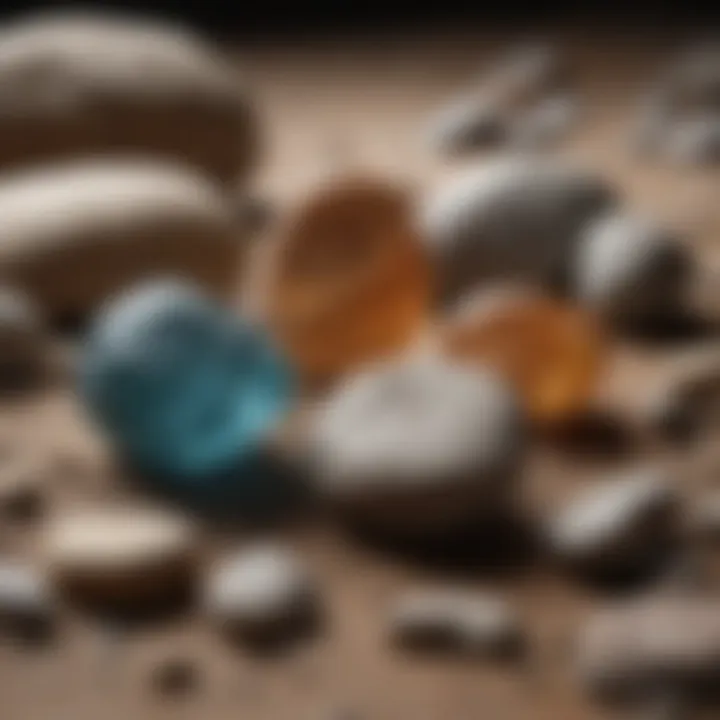
The last step in this process is the final polishing, a technique that ultimately reveals the rock's luster. It’s where the magic happens and the rock transforms from a rough specimen to a sparkling gem. Here are some key tips:
- Use the Right Polishing Pad: Silicone carbide or felt pads work well for the final phase. Choose a pad that matches your compound, as this can significantly affect the outcome.
- Gentle Touch: Apply light pressure during this stage; the goal is to enhance shine without damaging the rock.
- Evaluate Regularly: Continually check your progress to ensure that you are achieving the desired finish. You might need to go back to sanding if you find imperfections.
Employing these techniques systematically can turn ordinary rocks into stunning polished pieces, fitting for display or collection. Remember, the key to excellent results lies in patience and attention to detail throughout each step.
Types of Rocks and Their Characteristics
Understanding the various types of rocks and their unique qualities is fundamental to mastering the art of rock polishing with a Dremel tool. Each rock type possesses distinct properties that influence not just the polishing technique required, but also the end result. Choosing the right rock can make the difference between a polished gem that gleams with brilliance and a dull surface that fails to captivate.
When selecting stones for polishing, it’s critical to be aware of hardness, porosity, and crystalline structure, as these factors dictate the time, abrasives, and care needed during the polishing process. This knowledge not only enhances the results but also enriches the overall experience for rock collectors and enthusiasts.
"Knowledge of rocks is the first step to turning them into treasures."
Common Rocks Suitable for Polishing
Several types of rocks are particularly well-suited for polishing due to their hardness and surface qualities. Here’s a closer inspection of some popular choices:
- Agate: Known for its beautiful banding and colors, agate is a favorite among rock hounds. It typically has a smoother surface which polishes well and can range from translucent to opaque.
- Jasper: This is another robust option, available in various hues and patterns. Jasper offers a rich texture that creates vivid reflections after polishing, making it a sought-after choice for collectors.
- Quartz: As one of the hardest minerals (rated 7 on the Mohs scale), quartz can shine brilliantly. Its varied forms, including rose and amethyst quartz, enhance its desirability.
- Lapis Lazuli: This striking blue stone is not just visually appealing but also polishes quite well, showcasing its rich color when prepared properly.
- Granite: While more challenging to polish, granite produces stunning results due to its natural speckles and color variations. It requires the right tools and patience, but the outcomes are often worth the effort.
Rocks to Avoid
Not every rock is destined for a polish, and some should definitely be left untouched:
- Soft Rocks (e.g., Soapstone): While intriguing, softer stones can easily scratch or crumble under the pressure of polishing, leading to disappointing results.
- Porous Rocks (e.g., Pumice): These rocks can absorb polishing compounds and stain easily, often resulting in a muddy appearance rather than a polished shine.
- Rocks with Fibrous Structure (e.g., Asbestos): Beyond their aesthetic insecurity, asbestos is dangerous and should be avoided entirely, both for health reasons and during the polishing process.
- Crystalline Rocks (e.g., Pyrite): Known as fool’s gold, pyrite can tarnish or deteriorate when polished, so it's best left in its natural stone form.
Being familiar with these good and bad choices is essential for anyone looking to polish rocks effectively. The path to creating stunning, polished specimens not only lies in the right techniques but also begins with choosing the right rocks. Understanding these aspects ensures not just a successful hobby, but a safe one as well.
Safety Considerations
When it comes to polishing rocks, the thrill of creating shiny, beautiful specimens can sometimes overshadow the crucial importance of safety. Understanding safety measures not only protects you, the enthusiast, but also ensures that your work with the Dremel tool is effective and enjoyable. By taking simple precautions, you can focus on honing your craft without unnecessary worry.
Protective Gear
Before embarking on your rock polishing journey, donning the proper protective gear is non-negotiable. Safety goggles are your first line of defense, shielding your eyes from any dust and debris that may fly around during the polishing process. A face mask is equally important; dust generated while sanding can be harmful when inhaled, particularly with certain rock types that might release toxic particles.
A sturdy apron is also advisable to protect your clothing and skin from any unforeseen splatters that can occur with polishing compounds. Lastly, don’t forget about sturdy gloves—these will provide not just grip but also protection from sharp edges on rough stones.
In sum, investing in quality protective gear is essential. Think of it as a smal price to pay for peace of mind while engaging in this rewarding hobby.
Workspace Safety
Creating a safe workspace is just as vital as wearing the right gear. Choose a well-ventilated area, as rock dust and fumes can build up quickly, potentially leading to health hazards. Make use of a drop cloth or a dedicated workbench to contain the mess; a clean workspace minimizes distractions and lets you focus on the task at hand.
Ensure that tools are organized and within easy reach, yet safely stored away when not in use. Clutter can lead to accidents, whether it's tripping over stray equipment or misplacing important materials. Bright lighting is also key, as it helps you see fine details while polishing, ensuring safer handling of tools.
It's worth mentioning that when using the Dremel tool, always be mindful of your surroundings. Keep children and pets at a distance, as the noise and movement can be both distracting and hazardous.
In summary: Proper protective gear and a well-organized workspace are essential to ensuring a safe and effective rock polishing experience. By following these guidelines, you can enjoy the process and let your creativity shine without compromising your safety.
Troubleshooting Common Issues
Rock polishing, while rewarding, can throw curveballs along the way. Understanding how to troubleshoot common issues is essential in ensuring your polished rocks turn out exactly as you envisioned. Whether you’ve accidentally introduced scratches or are dealing with uneven finishes, addressing these problems can save time and frustration, ultimately leading to a more satisfying hobby experience. Below, we dive into specific challenges you may face and how to tackle them effectively.
Dealing with Scratches
When working with a Dremel tool, scratches can arise rather easily, which can be quite disappointing after all the effort you put into polishing. They may occur due to improper technique or if you use the wrong grade of polishing compound.
Here are some strategies to help you mitigate and deal with scratches:
- Identify the Source: First, determine how the scratches occurred. If you notice them during the sanding stage, it might be because too coarse a grit was used initially. Switching to a finer grit should help eliminate them.
- Repair Techniques: For minor scratches, you can often simply reapply polishing compound with a softer buffing pad. Aim to polish gently, using circular motions without applying too much pressure. Repeat as needed until scratches are less visible.
- Consider Resanding: If scratches appear severe and visible, it may require going back to the early sanding stages. Use a coarser sandpaper to effectively remove the scratches before gradually moving back up to finer grits.
"Patience is the key in rock polishing. Rushing can lead to mistakes which require double the effort to fix."
Uneven Polishing Outcomes
Achieving an even finish is perhaps one of the most challenging aspects of rock polishing. An uneven polish can detract from the natural beauty of the rock. Various factors can contribute to this issue, ranging from inconsistent pressure during polishing to the type of tools or compounds being used.
To address uneven polishing outcomes, consider the following:
- Check Your Technique: Ensure you are applying consistent pressure throughout the polishing process. Uneven pressure can result in patchy areas. Move the Dremel tool slowly and steadily over the surface to help promote even wear and shine.
- Evaluate Your Tools: Sometimes, the specific bits or pads you're using can result in uneven results. Ensure you are using the right kind of polishing compounds suited for your rock type. Investing in different grits and high-quality polishing bits may greatly improve the final outcome.
- Use an Inspection Light: An inspection light can help you see imperfections that might not be visible under normal lighting. Regularly checking your progress can guide you in adjusting techniques accordingly, ensuring a consistent look.
By keeping these troubleshooting methods in mind, you'll enhance your skills and ensure each piece of polished rock genuinely shines as it should.
Caring for Your Equipment
Caring for your equipment is one of the cornerstones of an effective rock polishing experience. Without proper attention to your tools and materials, not only can their lifespan be cut short, but the quality of your results may also suffer significantly. Whether you are a seasoned pro or just dipping your toes into the world of rock polishing, understanding the finer points of equipment care is essential in maintaining the integrity and efficiency of your process.
Maintaining the Dremel Tool
The Dremel tool is the heart of your polishing operation. Regular maintenance is crucial for ensuring it operates smoothly. Here are a few tips:
- Clean after each use: Dust and debris can build up in the tool's vents. Use a can of compressed air to blow out any residue from the vent areas. A clean tool not only runs better but lasts longer.
- Check for wear on bits: It’s commonplace to assume that just because a bit looks good, it performs well. Inspect them regularly. If a bit appears worn or frayed, replace it. Worn bits can lead to poor polishing results and can even damage your stones.
- Inspect the power cord: If you’re working with a corded Dremel, check for frays or cracks. A damaged cord can present a safety hazard.
- Lubricate moving parts: Light oil on the rotating parts can keep your Dremel running quietly and smoothly. Just remember to wipe off any excess oil before using it on stones.
By tending to your Dremel tool, you not only maintain its performance but also guarantee that it serves your polishing endeavors for years to come. Preventative care in this department pays off remarkably in the long run.
Storing Polishing Materials
Just as your Dremel needs maintenance, your polishing materials require special attention as well. Proper storage can preserve their effectiveness and ensure they are ready to go whenever you are.
- Cool, dry space: Keep your polishing compounds in a cool and dry environment. High humidity can ruin compounds, making them clumpy or ineffective.
- Label containers: It helps to categorize compounds by type and application—this saves time when you need to grab a specific material in the heat of polishing.
- Separate storage for bits: Utilize a dedicated case or a drawer for your polishing bits. This not only prevents them from getting damaged but also keeps them organized and easily accessible.
If you take care of your polishing materials, you’ll find they work more effectively, leading to better polishing results. This method of care ensures that your rocks shine brighter, and your efforts do not go to waste.
"A well-kept tool is a craftsman’s best friend."
In summation, your approach to caring for your Dremel and polishing materials directly correlates with the quality of your polished rocks. Prioritize regular maintenance and sensible storage strategies, and you’ll find yourself well-equipped to tackle your polishing projects with confidence.
Showcasing Your Polished Rocks
When you've invested countless hours into polishing rocks, showcasing your handiwork becomes an important part of the journey. It’s not just about making rocks shiny—it's about sharing the stories behind each piece and celebrating the beauty of nature captured through your efforts. By displaying these polished stones thoughtfully, you elevate your hobby and potentially inspire others. The process of creating eye-catching displays can also be rewarding to the artist within you.
Creating Display Cases
One practical way to feature your polished rocks is by crafting or purchasing display cases. These cases not only protect the rocks from dust and damage but also serve as a functional decor item, enhancing the aesthetic of your space.
Here are some tips to effectively create display cases:
- Choose the Right Material: Glass cases not only offer visibility but give a clean, modern look, while wooden boxes may add a rustic charm. Both have their unique appeal, so pick one that resonates with your style.
- Light Matters: Natural light can enhance the colors and luster of your polished rocks. Consider placing the display in a well-lit area, but avoid direct sunlight to prevent fading.
- Arrangement is Key: Experiment with different layouts. Try clustering small rocks together, or if you have larger specimens, let them stand out individually. Varying the heights of items can create visual interest.
- Labeling: Adding small labels or tags to each rock can give context—material, origin, or even a personal story linked to your polishing journey. This can enrich the viewer's experience and spark conversations about your collection.
Integrating Polished Rocks into Collections
Polished rocks can also be seamlessly integrated into larger collections. This not only showcases your polished works but can highlight the diversity of your collecting journey.
Here’s how to integrate these pieces effectively:
- Thematic Displays: Curate your polished rocks based on themes: perhaps a section devoted to gemstones, another focusing on minerals. This thematic approach allows viewers to appreciate the rich variety in your collection.
- Use of Shelving: Installing floating shelves or display cabinets can open up your space. These allow for visible organization where you can swap pieces in and out as your collection grows or evolves.
- Incorporate with Other Collectibles: If you have other hobbies, consider integrating polished rocks with related collections. For example, if you're into fossils, combining polished rocks alongside fossilized specimens can create a stunning and informative display, showing the broader context of geological aesthetics.
"A polished rock is not just a piece but a canvas of nature's history, waiting to be appreciated in all its splendor.”
Epilogue and Future Exploration
In rounding off our journey into the world of rock polishing with a Dremel tool, it is crucial to consider both the takeaways from this practice and the horizons still left to explore. This concluding section will cement the lessons learned while also casting an eye toward future pursuits in the realm of rock and mineral crafting.
One of the key elements of polishing rocks is appreciation. It's not just about achieving that perfect shine; it's about the stories each rock tells. One could argue that any rock, when polished, unveils layers of history and beauty. Polishing encourages a deeper connection to nature and to the earth's raw materials, and this sentiment is echoed among enthusiasts who gather in local clubs or online forums like reddit.com to share tips and showcase their work.
Additionally, the act of polishing can be therapeutic. For many, it is a meditative practice, an opportunity to disconnect from the hustle and bustle of everyday life and engage with something tangible and real. This hobby fosters patience and precision, skills that can translate well into other life areas. And while mastering the fundamental techniques offers substantial satisfaction, there remains a vast expanse of advanced methods and styles that beckons the adventurous spirit.
Exploring these more complex polishing techniques not only enhances the aesthetic quality of the stones but can also present an opportunity for further creativity. Whether channeling one's inner artist through unique finishing styles or pushing the boundaries of what types of rock textures one can achieve, curiosity is half the fun in this journey.
"The journey of polishing rocks with a Dremel is not just in creating beautiful pieces, but in uncovering hidden potential. Each stone is a testament to nature's artistry, waiting for the right touch to bring it to life."
Finally, as you reflect on your own growth, consider keeping a log of your procedures and outcomes. Documenting this journey can invaluable, especially as you discover what works best for you. This lays the foundation for a skilled hobbyist who can move seamlessly from novice to expert, providing rich insights to fellow rock polishers.
By embracing the ongoing learning process and maintaining an open mind towards future ventures, you're setting the stage for continuous improvement and inspiration within the field.
Reflecting on the Learning Process
Reflecting on what has been learned is invaluable for anyone delving into rock polishing. As in any craft, each step presents its own challenges, and with them, opportunities to learn and grow.
It's vital to assess not just the final polished piece but also the methods employed. For instance, understanding how different sanding techniques affect the luster and texture involves both trial and error. You might find that certain rocks react better with specific polishing compounds or that varying speeds on the Dremel yield different results. These observations deepen your comprehension and competence in the craft.
Moreover, sharing experiences with fellow enthusiasts, whether through local gatherings or online communities, enriches this reflective process. Engaging in discussions about failures and successes can lead to discovering insights and techniques that might not have crossed your mind otherwise.
In essence, every polished rock serves as a testament to your personal journey, each reflecting not just your skills but also your evolving understanding of the craft.
Exploring Advanced Polishing Techniques
Venturing into advanced polishing techniques opens up new avenues for creativity and artistic expression. Engaging with these methods requires a sturdy foundation, but familiarity with essential techniques provides the confidence needed to explore more intricate styles.
One such technique is the use of high-speed polishing wheels combined with specialized compounds that can achieve an unprecedented shine. Noteworthy options include cerium oxide or diamond paste, which can elevate a piece to museum-quality brilliance. These materials, usually found online or at specialized craft stores, require proper application techniques, as their potency can both enhance and easily mar a finish if misused.
Another adventure lies in the realm of surface texturing. Some artisans opt for partial polishing, a method that creates striking contrast between shiny and matte sections of the rock. This approach not only emphasizes the rock's natural features but also transforms a simple piece into a statement art object.
For those with a penchant for experimentation, consider incorporating natural inclusions or layering different types of stones. This will present a whole new set of challenges, but the right techniques can yield astonishing, unique results that differentiate your work.
As you explore these advanced techniques, you’re not just polishing rocks anymore; you’re crafting personal masterpieces. This continual evolution keeps the hobby fresh and engaging, ensuring that each piece not only gains physical shine but also resonates with your growth as an artist and collector.


